I3WM installation on Arch Linux

There is a nice site to start learning Linux: This is Arch wiki. In fact, an interesting thing to do is starting by installing Arch linux following Arch’s wiki installation guide. Of course, I wouldn’t recommend doing this on your laptop hardware, but I would rather recommend installing it using a virtual machine first, until you feel comfortable with your Arch Lilnux installation.

In this case, as I’m a linux user, I’ll create a new VM using KVM with the help or virt-manager, which is faster than VirtualBox. However, Virtualbox has a clear advantage over KVM: You can use it in Windows, MacOS and of course, in Linux.

Creating the Virtual Machine

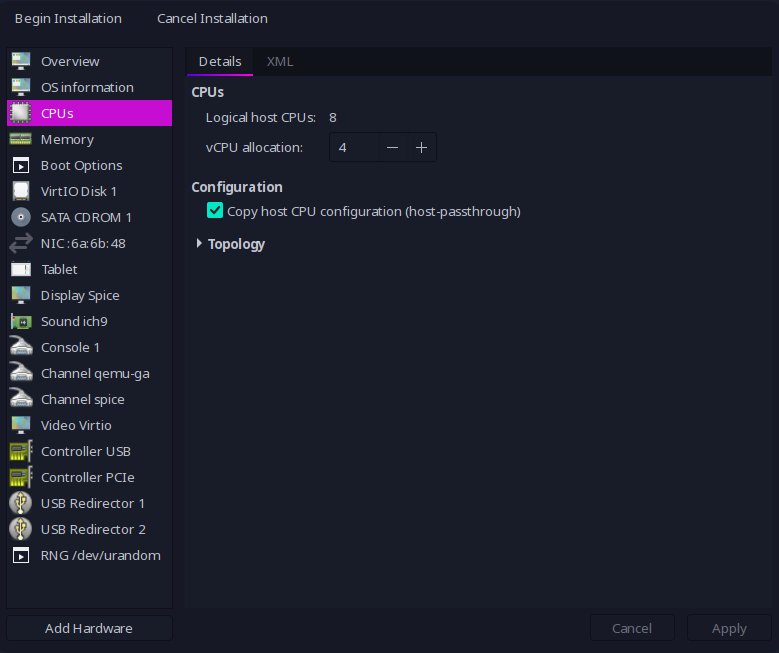
You can download the ISO image following the instructions in their download page. You can also create your Virtual server using virt-manager (or the way you prefer it). You should properly configure your virtual hardware (in my case I’ll use 8Gb Ram and 4 CPU cores and a new 60Gb hard disk, which is far more than needed).

The CPU configuration for my VM will use a host-passthrough for my host configuration. This will be quite performant and will allow me to use nested virtualization whenever I want to use it… And I’m sure I’ll want to use it a some point in the future.

CPU Configuration – Copy CPU configuration.

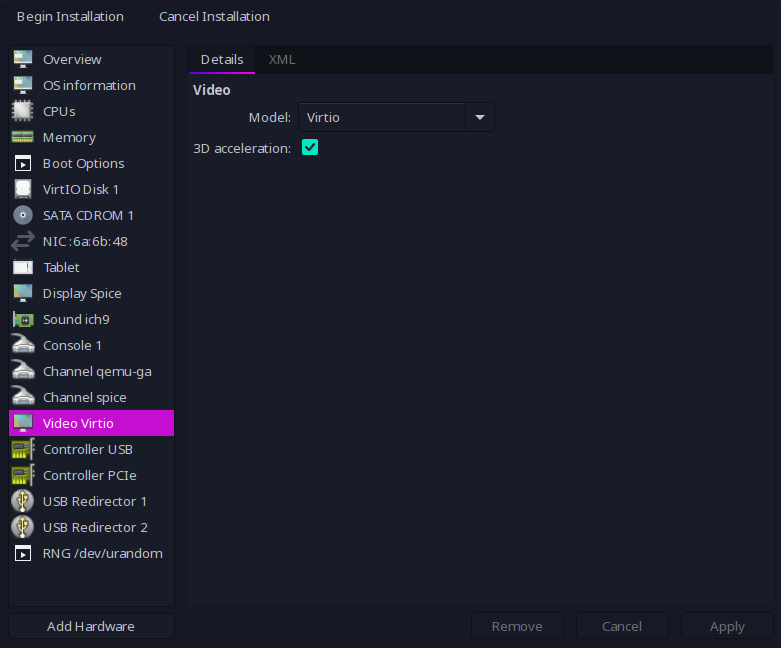
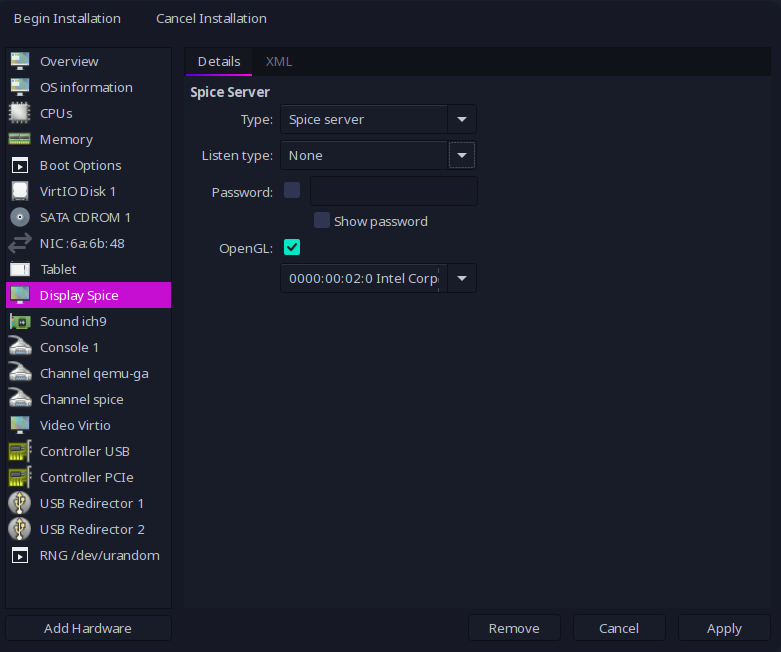
In order to get good enough performance with the video driver without bloating the CPU usage in the physical host, I’ll configure:

Video virtio (paravirtualized) allowing 3D acceleration
Display Spice configuration (Intel chipset)

Starting my Arch Linux VM and Installation

Once we have everything configured, we start our virtual server and start Installation. The important thing here is read and understand the wiki’s installation guide.

# Load keymap -- Default is "US". Mine is "es"... Use yours
loadkeys es

# Verify your IP link
ip link

# Mine is enp1s0 -- so, I'll get my IP
dhclient enp1s0

# Update date
timedatectl set-ntp true

Now one very important part: partitioning disks. In my case, as I’m using KVM, my disk is “named” as /dev/vda, This is the one where I need to make the partitions with fdisk. I’ll do it the simplest way this time:

Using fdisk to partition disk.

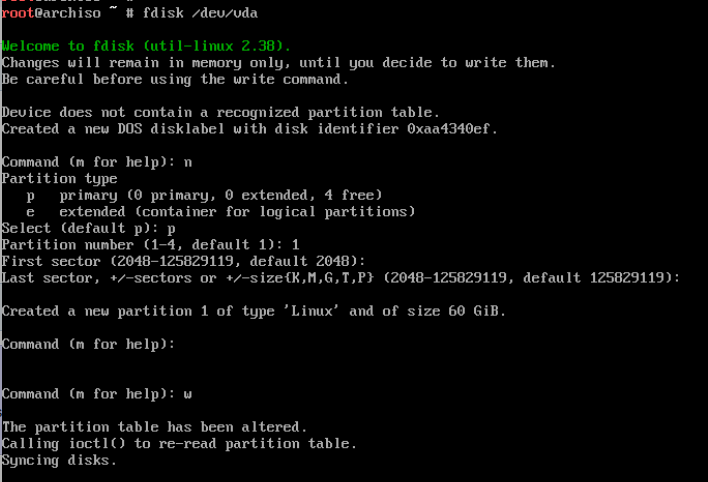
After the partition, we must type a few commands to do the actual installation

# Format the partition
mkfs -t ext4 /dev/vda1

# Mount the partition in /mnt
mount /dev/vda1 /mnt

# Install the essential packages (and other useful packages)
pacstrap /mnt base base-devel linux linux-firmware grub  neovim nano sudo git

# Generate the fstab file
genfstab -U /mnt >> /mnt/etc/fstab

# Change the root directory to /mnt to continue the installation.
arch-chroot /mnt

# Configure the timezone (mine is Madrid)
# ln -sf /usr/share/zoneinfo/Region/City /etc/localtime
ln -sf /usr/share/zoneinfo/Europe/Madrid /etc/localtime

# Run hwclock(8) to generate /etc/adjtime:
hwclock --systohc

# Edit /etc/locale.gen and uncomment needed locales.... This can be usim nvim
# or using nano
sed -i 's|#en_US.UTF|en_US.UTF|g' /etc/locale.gen
sed -i 's|#es_ES.UTF|es_ES.UTF|g' /etc/locale.gen

# generate locales
locale-gen

# Configure LANG variable in locale.conf
echo "LANG=es_ES.UTF-8" > /etc/locale.conf

# Configure Console keys
echo "KEYMAP=es" > /etc/vconsole.conf

# Configure a hostname for the server and /etc/hosts
echo "archi3" > /etc/hostname

# Esto se puede editar con nvim o nano
cat << EOT > /etc/hosts
127.0.0.1    localhost
::1          localhost
127.0.0.1    archi3
EOT

We should add now a new user and allow it to become root using sudo. Arch Linux suggest the mechanism to do this is allowing the wheel group to become root using sudo, that’s why we need to change /etc/sudoers as follows.

## Uncomment to allow members of group wheel to execute any command
%wheel ALL=(ALL) ALL

It is time to create the user and add it to goup “wheel” so it can become root.

# Create the user
useradd -m jicg

# Add it to the group "wheel", so it can become root
usermod -aG wheel jicg

# Add a new password to jicg
passwd jicg

The next step is adding grub loader so the operating system can load in next reboots and enabling NetworkManager service so it boots with a simple Network configuration. One last step: reboot.

grub-install /dev/vda

grub-mkconfig -o /boot/grub/grub.cfg

systemctl enable NetworkManager.service

exit

reboot

Additional configurations

I’ve created a small script which can be used to install a few important things: https://raw.githubusercontent.com/jicarretero/jicgeu-support/master/ArchLinuxWithI3WM/00_install_basic_software.sh

You can download it and run it as root. It will install X11 with lighdm, openssh and set the key map to Spanish inside X. So, after running the script we’ll have X-Windows there installed with a very simple greeter (lightdm default greeter):

lightdm greeter

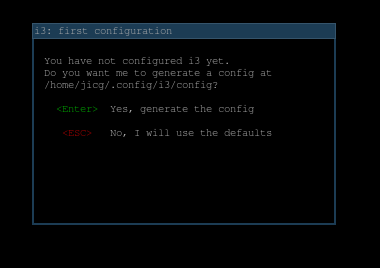
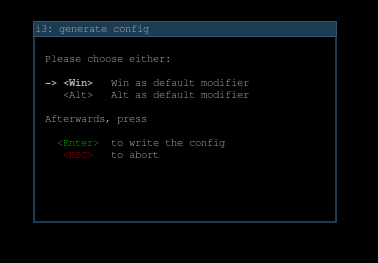
The first time we start I3WM, it will create a new configuration file. A very simple configuration file. It’ll make us choose what is the “default modifier” key. I thing the Windows key is the one to choose.

1st time starting i3wm
Select Mod Key — Win is the one I choose.

In order to be able to do something with i3wm, we must know a couple key bindings:

  • <win>+<enter> — Opens a terminal
  • <win>+d — Opens a menu. We can type, for example firefox in order to open a browser
  • <win>+1,2,3,…, 0 — Changes to a different “desktop”. We have 10 by default.

A final thought

The windows are not in optimal resolution at this time. In order to improve resolution, I would check with xrandr the possibilities

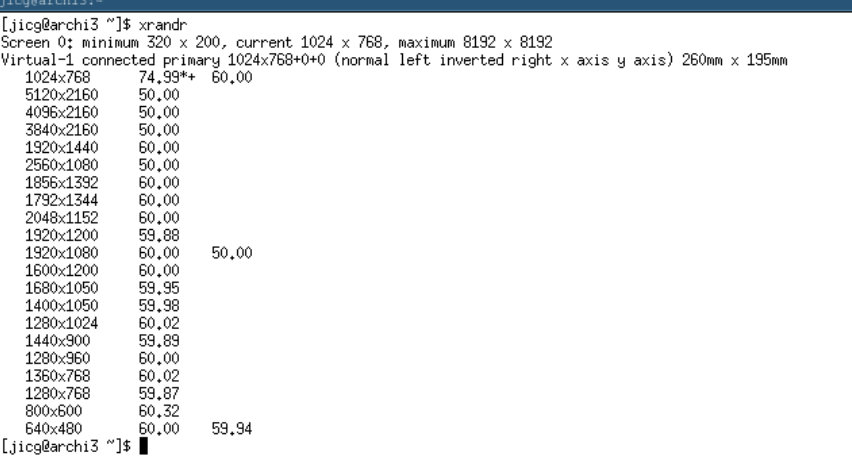
In my case, 1920×1080 will do the job:
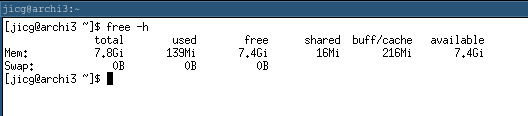
xrandr -s 1920x1080

This is a very lightweight operating system. At boot time, with only a terminal, it will less than 140Mb to run:

Less than 140Mb to run our Arch Linux + basic I3WM

I moved to Garuda Linux

I recently installed Garuda Linux in my Laptop. The installation is easy, the system is beautiful and powerful and it has all the software you may need. It’s worth to give it a try. They even have a gaming edition (although I decided not to try it beause I only play Sudokus and Minesweeper). It is based on Arch Linux and uses Arch’s repos, so there’s plenty of working software there. These are a few thoughts about my first week experience.

I’ve been an Ubuntu user for the last 15 years, both in Servers and desktop. I’ll keep on being an Ubuntu server user for a long time. I like Ubuntu servers. However, I wanted something different for my desktop.

I’ve been using KDE for the last year and I find it to be more productive than Gnome. I basically use Thunderbird, gvim, konsole, PyCharm, Go, bash, Brave Browser, kvm, lxc, docker. It was ok. However I moved to Garuda Linux (a KDE distro based on Arch Linux) and now I can use Thunderbird, gvim, konsole, PyCharm, Go, bash, Brave Browser, kvm, lxc, docker. And it is absolutely awesome. I must be a bit silly… All this work to have a KDE environment which resembles me to the one I had (but more beautiful) and to use the same software I always use.

I use CentOS servers, Debian servers, Ubuntu Servers and Kubuntu in my laptop, but I had never done anything with Arch Linux before. So, why not?. Let’s do it!

The very first problem I had using Garuda Linux was that there is no “vi” at all in the live CD. I though… “What? This can’t be a serious distro at all! What do they mean me to do without vi? what can I expect from life?”. At this moment I almost gave up. They had another editor called micro which is easy enough for newbies like me. — I was determined to solve the problem with vi later and I installed Garuda in my Laptop.

The installation process was easy and smooth. When the installation finished, and I started my Garuda for the first time, I was asked for a few options and all the software I use was installed automatically. Well… not all. Where the f*** is my vi?

Anyway, at this point I had my Garula Linux installed in my laptop and it is really nice. Not only that: everything was working properly. Goodbye to some problems introduced with Ubuntu 20.04 with my Wifi network interface. Everything was in its place. It is time to start using my Laptop.

So, my first idea was to see if I could still deploy my Kubernetes deployment on lxc. And it failed. But despite of failing, my KDE/Plasma environment crashed. So I went to the Garuda Forums to ask this kind of silly questions. They answered quite fast and they were really kind. Thank you guys!. The problem is, Ubuntu 20.04 uses CGROUPS and Garuda uses CGROUPS2. It didn’t seem to be a good idea nesting CGROUPS this way. The workaround which solved the problem is: Setting the Kernel parameter “systemd.unified_cgroup_hierarchy=0” in /etc/default/grub, updating grub (update-grub) and restart. — If I ever have time, I’ll investigate further on this, I’ll come with a better solution and I’ll post something in this blog. The important thing is that I had my K8S minicluster working again.

Garuda Linux comes with Btrfs. It is a nice filesystem, but by far much slower (at least this is my perception) than the classic ext4 for writings. My Virtual servers with KVM weren’t as performant as I remembered them. I mounted /var/lib/libvirt/images in an ext4 partition in my second hard drive as well as my /var/lib/lxc. However, I’m happy the way dockers work using btrfs, this is nice.

Again, and due to btrs slugishness, I decided to use ext4 for my /home directory. I had to boot again in the installer – F***! again no vi! – and using gparted I shrinked my btrfs partition, added a new ext4 partition for my /home, changed /etc/fstab to mount my ext4 partition… and the performance improved (again, this is my perception).

I had a new default shell in Garuda. I’ve been working with bash for many years and Garuda has fish as the default shell. Ok, I’ve decided to give it a try and I like it. However, I had to tweak a couple of things in the shell: The default editor isn’t vi by default!!! (Unbeliebable). And the terminal type was Konsole by default, which make things not to work properly when I ssh to other hosts. So, I edited the ~/.profile file and made some changes:

export BROWSER=brave
export EDITOR=/usr/bin/vim
export MAIL=thunderbird
export TERM=xterm
export VISUAL=gvim

I also had to tweak and add a few lines to the ~/.config/fish/config.fish script in order to be able to add my ssh key to my ssh-agent if it is running or launch a new one if it is not running:

setenv SSH_AUTH_SOCK (find /tmp -name agent.\* 2>/dev/null)
if ! test -n "$SSH_AUTH_SOCK"
    eval (ssh-agent -c) >/dev/null
end
ssh-add ~/.ssh/id_rsa 2>/dev/null                                                                                    

I’m also an Evernote user. It is not Open Source software and I pay for my subscription every year. A couple of days after migrating to Garuda Linux, Evernote announced their Linux official client and released a beta version for Linux as a Debian package. I wanted to give that client a try, but now I don’t have a Debian based system anymore. Luckily, the Arch guys made the debtap tool and it allows importing debian packages to Arch Linux. After a couple commands I had my official Evernote client installed and ready to be tested.

This has nothing to do with Garuda, but Evernote announced an official linux client for 2020 In January 2020 and one year later it is here. They used electron to wrap the Web version. I found no real adventages over Tusk (a popular Evernote client and the one I use). Yes, they added a couple menus, but I can’t see what makes the difference. — Evernote official client uses 0.75Gb of RAM as it starts (0.9Gb the first run), Tusk uses 0.42Gb of RAM. I said before that I saw no advantage and I was absolutely wrong: You can work offline!. This is really important. Sorry for my mistake.

To sum up, I’m finally happy with the result. It’s worth to give it a try because it is beatiful, powerful and easy to install. You can visit their web site: