
After writing about using LXC and showing its capabilities to run Docker and Virtual Machines, in a Post showing how to start with LXC, and the second one showing how to deploy a Kubernetes cluster in with LXC, I’m going to show today how I’ve deployed an Openstack Cluster using LXC, once more I’ll be using ansible as a helper tool to deploy the containers and install the software I’ll need to deploy in the cluster before deploying Openstack.
As I already said in my previous post, I’ll recomend you to be aware that THIS IS NOT A PRODUCTION SOLUTION. IT IS REALLY UNSECURE. IT IS ONLY INTENDED TO SIMULATE INFRASTRUCUTRE.
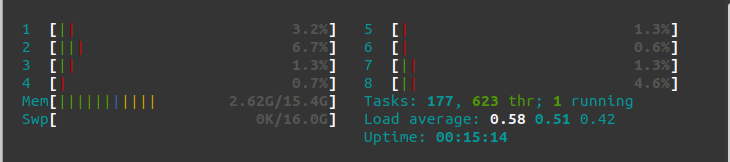
Before doing anything, just starting my Ubuntu 20.04 with my Brave Browser to start writing this POST, my memory consumption is 2.62 Gb.
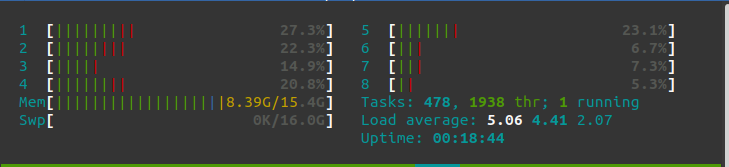
After starting my Openstack cluster with one controller and 3 compute nodes, my memory consumption is 8.4Gb. Yes, it is not cheap in terms of memory, however, it is rather affordable. You can always do with 1 compute node anyway.
As you can imagine, this is going to be a very simple Openstack deployment. Only with a few basic services: Nova (to deploy VMs), Neutron (to manage networks), Glance (for the VM images) and Keystone (for user identification). Maybe in a future I’ll write about deploying more services to this Openstack installation like Cinder to manage volumes or Ceilometer for Telemetry. But in this case it is going to be a very basic deployment.
Installing previous software in my server
Please, keep in mind that “My Server” is nothing but my own laptop. A HP Pavillion with Ubuntu 20.04 installed: Intel i7 with 16Gb RAM and 512Gb Hd.
First of all, I must have ansible installed, however, I already explained that in my POST about Kubernetes on LXC. Anyway, it is only a few lines, so I can write that again:
# To install LXC:
sudo apt install lxc lxc-utils lxc- templates lxc-dev

# To install other packages needed:
sudo apt install python3-lxc virtualenv sshpass bridge-utils
# ....
# Create the Virtual environment for ansible:
virtualenv -p python3 ~/.venv/ansible
source ~/.venv/ansible/bin/activate
# ....
# To install Ansible.
pip install ansible
As I’ll be using Kolla to deploy Openstack in this installation, I’ll install also in my Virtual Environment kolla-ansible (kolla-ansible==8.1.1 kolla-ansible==8.2.0 — I’ve chosen Stein version in this demo) and the Openstack CLI tools to be able to manage the Openstack Installation:
# Using the Virtual Environment from previous step:
pip install kolla-ansible==8.2.0 python-openstackclientBug: There is critical bug affecting due to other providers changes in the required packages this kolla-ansible version and previous ones (https://bugs.launchpad.net/kolla-ansible/+bug/1888657), but the bug fix is not released until version 8.2.1 of kolla-ansible (at the moment of this editing, it is not released yet), so a manual patch will be needed. Luckily its really easy to patch: https://opendev.org/openstack/kolla-ansible/commit/bbaa82619ee404d495ec5aef9468ecd52c5d76d3 — In our case, the file is ~/.venv/ansible/s
hare/kolla-ansible/ansible/roles/common/defaults/main.yml and you only need to insert this line after line 26:
PYTHONWARNINGS: “ignore::UserWarning”
    environment:
      ANSIBLE_NOCOLOR: "1"
      ANSIBLE_LIBRARY: "/usr/share/ansible"
      # The next is the new line to insert...
      PYTHONWARNINGS: "ignore::UserWarning"
    privileged: True
Caveat: Kolla-ansible doesn’t support Ubuntu 20.04. So, the containers must be Ubuntu 18.04. I’ll recomend you creating a first container manually before running these ansible playbooks because LXC downloads the base container and it installs the software using some kind of normal installation. The command is this one:
sudo lxc-create -t ubuntu -n u1 -- -r bionicWhilst the lxc-create is running and downloading the Ubuntu packages, you can see that apt is running:
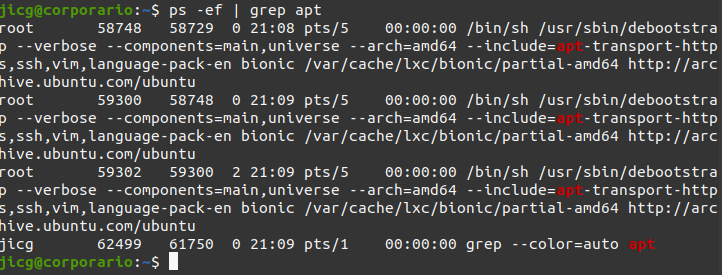
And at a certain point of the installation, it will make you questions that you’ll need to answer. If this is done for the first time using ansible, you won’t have any way to respond these questions and the installation will be stuck forever and it will never end.

Once deployed for the first time, the container will be in Cache and you won’t need to respond these questions again. So, you can answer “yes” this time and when it finish, you can destroy the container:
sudo lxc-destroy -n u1Creating the containers:
Once more, the configuration files I’ve created for the deployment are available in my github repo: https://github.com/jicarretero/jicgeu-support/tree/master/KollaAnsibleOnLXC. In order to visualize the Interconnection of the containers inside the server, I’ve drawn a very simple graph:
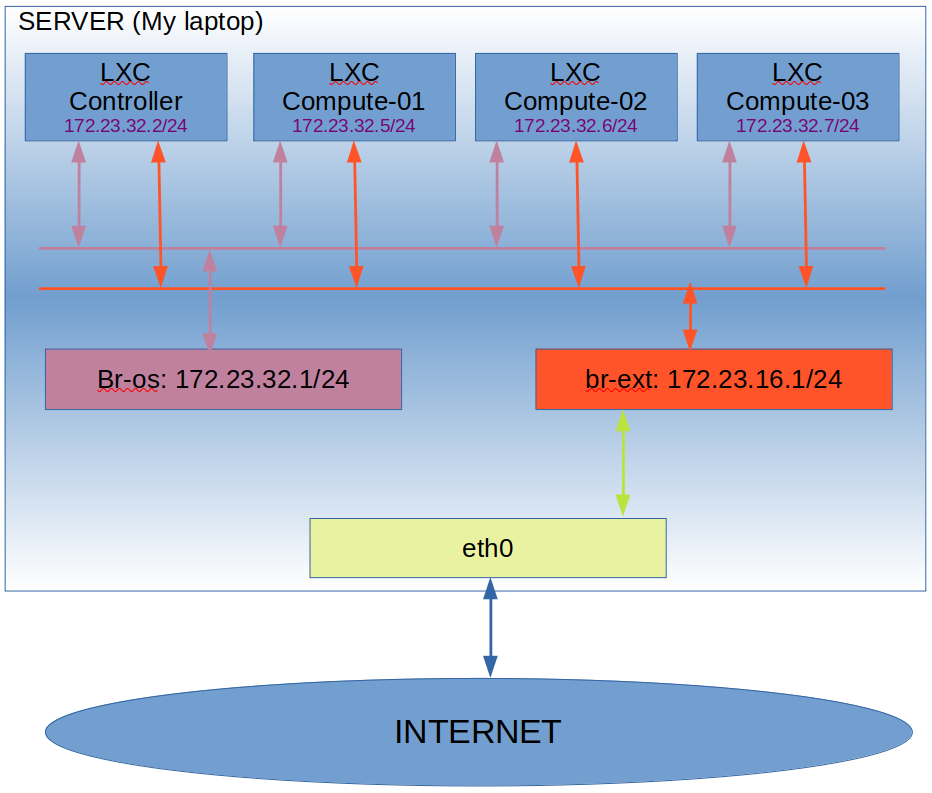
So, the big box is my server. Inside it there are 4 LXC containers connected to 2 bridges (I’ll create them in the installation). The Br-os bridge is intended as internal communication between the Openstack nodes. The br-ext bridge is intended for the communication of external VMs to the Internet. I’ve decided not to create VLANs or any other Isolation between the different networks for simplicity. However, in a production environment using real servers, these networks should be isolated for security (to prevent VMs from connecting to the Compute or Controller nodes.
The containers will be connected to the bridge br-ext using eth1 and this interface will have no IP configured. The Containers will be connected to the bridge br-os using eth2 and they’ll have an IP here in 172.23.32.0/24.
In order to create the containers, the ansible playbook named CreateLxcContainers.yaml must be run.
ansible-playbook -i inventory playbooks/CreateLxcContainers.yamlThis playbook ensures the 2 bridges are created, they are up and they have their corresponding IP. Despite of this, it ensures a few modules are loaded, because they’ll be needed whether for ansible-kolla deployment or for the containers to run properly:
– ebtables (required in ansible-kolla deployment)
– tap (required in the containers to implement a proper network)
– ip_vs (required in ansible-kolla deployment)
iptables -t nat -D POSTROUTING -s 172.23.16.0/24 ! -d 172.23.16.0/24 -j MASQUERADE || true
brctl addbr br-os || true
brctl addbr br-ext || true
ip addr add 172.23.16.1/24 dev br-ext  || true
ip addr add 172.23.32.1/24 dev br-os  || true
ip link set br-os up
ip link set br-ext up
iptables -t nat -A POSTROUTING -s 172.23.16.0/24 ! -d 172.23.16.0/24 -j MASQUERADE
modprobe ebtables
modprobe tap
modprobe ip_vs
After this configuration, it deploys the containers and some packets we’ll need for ansible-kolla deployment. You can see the file code in the Github repo mentioned above.
Preparing the containers
Once the containers are running, we must install some software in them to make them ready for Openstack. This is done with the playbook PrepareContainers.yml.
ansible-playbook -i containers_inventory playbooks/PrepareContainers.yaml
This playbook creates the user/group kolla and add it to the sudoers file. It adds an authorized ssh public key to ~kolla/.ssh/authorized_keys (this must be configured in file playbook/vars/containers.yaml, in the variable public_key. It is not configured with any default key.
The palybook also sets a netplan to configure networking in the container and restart the network and adds some packages that kolla installation will need.
The playbook will set up a new service which will run before the docker service starts in the LXC Container when the container boots. The service will run a script named shared-run.sh:
#!/bin/bash

mount --make-shared /run

[ -d /dev/net ] || mkdir /dev/net
[ -c /dev/net/tun ] || mknod  /dev/net/tun c 10 200
[ -c /dev/kvm ] || mknod  /dev/kvm c 10 232
[ -c /dev/vhost-net ] || mknod  /dev/vhost-net c 10 238
This script is intended to:
- Make the /run directory as shared (this is needed by Kolla dockers)
- Creates /dev/net/tun character device, which will provide better network performance.
- Creates /dev/kvm character device so Virtual Machines can be created using KVM (instead of QEMU — emulated virtualization, much slower)
- Creates /dev/vhost-net characer device to be able to create virtual networks and let the VMs to communicate between them.
Kolla-Ansible: The installation.
The installation of Kolla-Ansible is described here. However, I’m going to provide the steps in order repeat the installation I did.
As I explained before, I installed kolla ansible (Openstack Stein) in the ansible’s virtual environment. You can find kolla-ansible version here.
pip install kolla-ansible==8.1.1First of all, we need to create the directory /etc/kolla where kolla-ansible configuration files are stored. However, I simply will create a link this way from the KollaAnsibleOnLXC directory that I’ve previously downloaded from github:
(ansible) [jicg@corporario KollaAnsibleOnLXC(keystone_admin)]$ sudo ln -s $PWD/etc/kolla /etc/kollaThe next step is generating the Passwords for the installation (I’ve provided the passwords that I got once in one installation, but you should generate new passwords for your self). This step will overwrite the file /etc/kolla/passwords.yml with randomly generated passwords.
kolla-genpwdInventory
The inventory file is needed to deploy Openstack using Kolla. Of course, we must edit it before deploying Openstack. In the repository it is already provided an inventory file named multinode. It is tuned for the IPs I’m using in this demo deployment.
# These hostname must be resolvable from your deployment host
172.23.32.2 ansible_user=kolla ansible_become=true

# The above can also be specified as follows:
#control[01:03]     ansible_user=kolla

# The network nodes are where your l3-agent and loadbalancers will run
# This can be the same as a host in the control group
[network]
172.23.32.2 ansible_user=kolla ansible_become=true

[compute]
172.23.32.5 ansible_user=kolla ansible_become=true
172.23.32.6 ansible_user=kolla ansible_become=true
172.23.32.7 ansible_user=kolla ansible_become=true
.......
Kolla’s Configuration File
Now, we must consider reading and understanding the file /etc/kolla/globals.yml. In this file we’ll describe the deployment values that we want to configure for our Openstack deployment. A file tuned for our demo installation is provided in the code you could download from Git Hub.
I’m not going to describe all the parameters I used, but, at least I will describe a few parameters. Let’s start with our network interfaces:
network_interface: "eth2"
api_interface: "eth2"
tunnel_interface: "eth2"
dns_interface: "eth2"
neutron_external_interface: "eth1"
All LXC Containers are connected in the same way to the bridges. The interface eth2 will be used for “management” and it is connected to the bridge I named br-os. They’ll have an in the network 172.23.32.0/24.
The interface eth1 will be used for the Virtual Machines to connect to the Internet. In this case, this interface is connected to br-ext. No IP Is needed here for any LXC Container. In fact, in this case, it would be enough if only the controller had this network interface.
Another parameter is
kolla_internal_vip_address: "172.23.32.254"Which is a Virtual Interface to be used with ha-proxy. Maybe you can think it is not so interesting, but it is. In this case, no ha-proxy should be needed. But if I don’t use it, one task in kolla-ansible will wait until mariadb is ready in ha-proxy. It’ll never be ready and it will fail.
Other configurations are:
# What version of Openstack we'll be installing and the type of installation
kolla_base_distro: "ubuntu"
kolla_install_type: "source"
openstack_release: "stein"

# We'll be using rabbitmq for the communications amongst processes.
om_rpc_transport: "rabbit"

# We'll be using LinuxBridge to build networks
neutron_plugin_agent: "linuxbridge"

# The region name will be this RegionDemo:
openstack_region_name: "RegionDemo"

# The services we will use are: Keystone, glance, nova, neutron and rabbitmq
enable_openstack_core: "no"
enable_glance: "yes"
enable_haproxy: "yes"
enable_keystone: "yes"
enable_mariadb: "yes"
enable_memcached: "yes"
enable_neutron: "yes"
enable_nova: "yes"
enable_rabbitmq: "yes"

# We'll be using KVM for virtualization. Not QEMU (The default one)
nova_compute_virt_type: "kvm"
Despite all of these configurations, we will add 3 passwords (the problem these passwords are not generated with command kolla-genpwd and they are required to complete the installation:
rabbitmq_monitoring_password: "12345678"
redis_master_password: "12345678"
placement_database_password: "12345678"
Anyway, please, take a look to the /etc/kolla/globals.yml file and try to understand it.
Finally, the deployment
There are 3 steps to deploy ansible-kolla:
The first step is bootstrapping the LXC Containers, which is done with command:
kolla-ansible -i multinode bootstrap-serversThe second step is optional. This is used to check if everything is ready to install:
kolla-ansible -i multinode prechecksAnd finally the installation. The installation will fail because some configurations can’t be applyed in the containers. There are workarounds for this, although this is not the solution I choose, anyway, you’d only need to add in your /etc/kolla/globals.yaml the line:
set_sysctl: "no" However, I’ve modified one kolla-ansible file: ~/.venv/ansible/share/kolla-ansible/ansible/roles/neutron/tasks/config.yml ~/.venv/ansible/share/kolla-ansible/ansible/roles/neutron/tasks/config-host.yml adding the line “ignore_errors: yes” at the end of the fist task there:
- name: Setting sysctl values
  become: true
  vars:
    neutron_l3_agent: "{{ neutron_services['neutron-l3-agent'] }}"
  sysctl: name={{ item.name }} value={{ item.value }} sysctl_set=yes
  with_items:
    - { name: "net.ipv4.ip_forward", value: 1}
    - { name: "net.ipv4.conf.all.rp_filter", value: "{{ neutron_l3_agent_host_rp_filter_mode }}"}
    - { name: "net.ipv4.conf.default.rp_filter", value: "{{ neutron_l3_agent_host_rp_filter_mode }}"}
    - { name: "net.ipv4.neigh.default.gc_thresh1", value: "{{ neutron_l3_agent_host_ipv4_neigh_gc_thresh1 }}"}
    - { name: "net.ipv4.neigh.default.gc_thresh2", value: "{{ neutron_l3_agent_host_ipv4_neigh_gc_thresh2 }}"}
    - { name: "net.ipv4.neigh.default.gc_thresh3", value: "{{ neutron_l3_agent_host_ipv4_neigh_gc_thresh3 }}"}
    - { name: "net.ipv6.neigh.default.gc_thresh1", value: "{{ neutron_l3_agent_host_ipv6_neigh_gc_thresh1 }}"}
    - { name: "net.ipv6.neigh.default.gc_thresh2", value: "{{ neutron_l3_agent_host_ipv6_neigh_gc_thresh2 }}"}
    - { name: "net.ipv6.neigh.default.gc_thresh3", value: "{{ neutron_l3_agent_host_ipv6_neigh_gc_thresh3 }}"}
  when:
    - set_sysctl | bool
    - (neutron_l3_agent.enabled | bool and neutron_l3_agent.host_in_groups | bool)
  ignore_errors: yes
The fact is that there are things that doesn’t go well, but indeed the task does other things which are useful, I mean, it sets the variables it can set and which are needed, although it can’t set them all. That’s the reason I don’t set the variable “set_sysctl” to false to prevent it from executing. I could have done so and adding the lines to the sysctl.conf in my own playbooks. I preferred this one. Anyway, up to you.
Once this little patch is appliyed, I run the deployment:
kolla-ansible -i multinode deployYour Openstack Installation
After the installation, you can start using you new Openstack. First you’ll need to know your admin Password:
grep keystone_admin_password /etc/kolla/passwords.ymlAnother thing you’ll probably want to do is adding a few lines to your /etc/hosts files. Just for convenience. Please pay attention to the controller IP. Yes, it is the same we added in the configurations for the variable kolla_internal_vip_address
172.23.32.254     controller
172.23.32.5       compute-01
172.23.32.6       compute-02
172.23.32.7       compute-03
Once done that, you can start your browser to see something or your Openstack installation:
After login you’ll get in a very meaningful screen:

This screen shows the results of some queries done to Openstack in order to get the usage of resource. Openstack services are needed (so they must be properly running) to render this page without errors.
Final consideration
I’ll write soon another POST about what to do with a new and clean Installation of Openstack. This POST has grown long, but I will write a crash course to make your Openstack installation in something which can be used soon.
It is here: https://www.jicg.eu/index.php/2020/06/27/starting-with-openstack-administration/